Parking lot striping is one of the most important — and most overlooked — investments a property owner can make. Crisp, clearly visible lines organize traffic, protect pedestrians, satisfy ADA federal law, and give every visitor a strong first impression the moment they pull in. Whether you manage a busy retail strip in Dallas, a medical campus in Denton, or a school parking lot in Plano, this complete guide covers every dimension of professional parking lot striping: compliance rules, material choices, project planning, cost breakdowns, maintenance schedules, and how to select the right contractor.
What Is Parking Lot Striping — and Why Does Every Property Need It?
Parking lot striping is the professional application of painted lines, symbols, and pavement markings to paved surfaces. These markings define vehicle stalls, designate accessible spaces, outline fire lanes, and guide pedestrian flow. In short, they are the visual language of any parking facility.
Furthermore, striping is not optional for commercial properties. Federal ADA standards and local municipal codes both mandate specific marking requirements. Ignoring them exposes property owners to civil penalties, insurance complications, and serious liability in the event of an accident.
According to the U.S. Department of Justice ADA portal, non-compliant parking facilities face fines up to $75,000 for a first violation and $150,000 for repeat violations. Consequently, proper striping is as much a legal safeguard as it is a safety measure.
How Striping Affects Traffic Flow and Safety
Well-executed parking lot striping reduces fender-benders, minimizes pedestrian conflicts, and helps property managers squeeze the most usable spaces from a given footprint. In contrast, faded or missing lines create confusion that leads directly to accidents and frustrated visitors.
Specifically, studies from the National Safety Council consistently link poor lot layout to elevated accident rates. Clear directional arrows, defined pedestrian crosswalks, and properly sized stalls all work together to keep everyone moving safely.

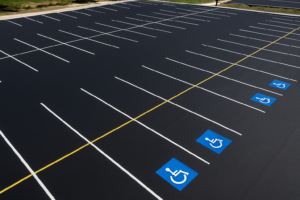
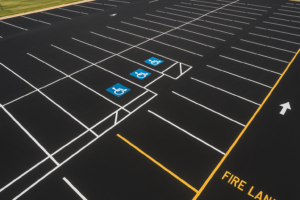
Professional parking lot striping includes ADA symbols, fire lane markings, and precisely spaced stall lines for maximum efficiency and safety.
ADA Compliance Requirements for Parking Lot Striping
The Americans with Disabilities Act (ADA) — a landmark federal civil rights law enacted in 1990 — sets binding requirements for accessible parking spaces at virtually every commercial property in the United States. These rules govern space count, dimensions, signage height, access aisles, and required symbols.
Therefore, any parking lot striping project must incorporate ADA compliance as a primary design constraint — not an optional add-on.
ADA Space Count Requirements by Lot Size
| Total Lot Spaces | Min. Accessible Spaces | Van-Accessible Spaces |
|---|---|---|
| 1 – 25 | 1 | 1 |
| 26 – 50 | 2 | 1 |
| 51 – 75 | 3 | 1 |
| 76 – 100 | 4 | 1 |
| 101 – 150 | 5 | 1 |
| 151 – 200 | 6 | 1 |
| 201 – 300 | 7 | 2 |
| 301 – 400 | 8 | 2 |
| 501 – 1,000 | 2% of total | 1 per 6 accessible |
ADA Dimension Rules Every Striping Crew Must Know
- Accessible stalls must be at least 8 feet wide with a 5-foot access aisle on one side
- Van-accessible spaces require an 8-foot minimum access aisle (or an 11-foot-wide stall with a 5-foot aisle)
- The International Symbol of Accessibility must be painted on the pavement and posted on a sign at least 60 inches above the ground
- Accessible spaces must be located on the shortest accessible route to the building entrance
- Access aisles must be marked to discourage parking in them — typically with diagonal striping
- Slopes within accessible spaces and aisles must not exceed 1:48 (approximately 2%) in any direction
A qualified parking lot striping contractor will lay out these spaces correctly from the start. In contrast, cutting corners on ADA dimensions invites audits, complaints, and expensive retrofits.
Fire Lane Marking Rules
Fire lanes are clear zones that give emergency vehicles direct, unobstructed access to building entrances. Local fire codes — enforced by city or county fire marshals — mandate that these zones be visibly and permanently marked at all times.
Typically, fire lane markings include:
- Red curb paint along the designated no-parking zone
- “NO PARKING – FIRE LANE” stenciling on the pavement at regular intervals
- Yellow diagonal hatch markings in some jurisdictions for additional visual emphasis
- Posted signage at the start and end of the fire lane zone
Failure to maintain visible fire lane markings can result in citations from fire marshals, elevated insurance premiums, and serious liability if emergency access is delayed during an incident. Consequently, fire lane repainting is one of the most commonly requested add-ons to a full parking lot striping project.
Types of Parking Lot Striping: What Gets Painted and Why
A complete parking lot striping project goes far beyond basic stall lines. Professional crews apply a full range of markings, each serving a specific safety or compliance purpose. Understanding each type helps property owners plan a thorough, code-compliant project.
Standard Parking Stall Lines
Standard stalls are typically 8.5 to 9 feet wide and 18 to 20 feet deep for standard vehicles. These dimensions accommodate most modern cars and light trucks without wasting space. Wider stalls — up to 10 feet — are sometimes used in high-end retail or medical facilities where door-ding incidents are a concern.
Directional Arrows and Traffic Flow Markings
Directional arrows guide drivers through the lot in a logical, collision-minimizing pattern. In particular, one-way traffic lanes, entrance and exit designations, and stop bars all rely on clear arrow stenciling. Many municipalities require these markings in commercial lots. Without them, drivers invent their own routes — often the ones most likely to cause accidents.
Pedestrian Crosswalks
Crosswalk markings — typically bold white stripes painted perpendicular to vehicle travel lanes — define safe zones for foot traffic moving between the parking lot and a building entrance. They are a critical part of the overall pedestrian safety system. Furthermore, well-placed crosswalks signal to drivers that they must yield.
Curb Painting and Curb Stop Markings
Painted curbs communicate zones at a glance. Red signals fire lanes. Yellow typically denotes loading zones or short-term parking restrictions. Blue marks accessible parking areas. In addition, wheel stop markers — low concrete barriers painted bright yellow — protect curbs and building facades from vehicle overrun.
Reserved and Specialty Stall Markings
Beyond standard and ADA spaces, many properties need custom stenciling for reserved spaces (management, clergy, expectant mothers), EV charging stations, car-share vehicles, motorcycle parking, and fire department connections. A full-service parking lot striping company can handle all of these specialty markings in a single project visit.
Parking Lot Striping Materials: Paint vs. Thermoplastic vs. Epoxy
The material used for parking lot striping has a direct impact on longevity, cost, and maintenance frequency. There are three primary options: water-based traffic paint, thermoplastic, and epoxy.
Water-Based Traffic Paint
Water-based paint is the most widely used material for standard commercial parking lots. It is cost-effective, dries quickly (typically 30 to 60 minutes), and is available in a wide range of colors. However, it fades faster under intense UV exposure and requires reapplication more frequently — usually every one to two years in high-traffic areas.
Water-based paint is the right choice for low-to-medium traffic lots where budget is a primary concern and restriping can be scheduled on a regular maintenance cycle.
Thermoplastic Pavement Markings
Thermoplastic is a heated compound applied at high temperatures (typically 400°F or higher) that bonds directly and permanently to the pavement surface. According to pavement marking standards documented by Wikipedia, thermoplastic markings last three to seven years in high-traffic conditions — up to four times longer than conventional paint.
As a result, thermoplastic is the preferred material for busy retail centers, school campuses, hospital lots, and municipal facilities where restriping downtime is disruptive and expensive. The higher upfront cost typically pays for itself through fewer reapplication cycles.
Epoxy and Two-Component Paint Systems
Epoxy pavement markings are a premium option used in high-wear environments such as parking garages, warehouse floors, and airport aprons. They cure to a hard, abrasion-resistant finish and bond exceptionally well to concrete surfaces. However, epoxy is significantly more expensive and typically not necessary for standard asphalt lots. For most property owners, thermoplastic offers comparable durability at a lower price point.
Restriping vs. Full New Layout: How to Decide
Many property owners face this practical question: do I need a complete redesign, or is a professional restriping service sufficient?
Generally, restriping over existing lines works well when:
- The original layout is structurally sound and ADA-compliant
- Stall widths accommodate modern vehicles without modification
- Traffic flow patterns are logical and efficient
- The surface is in good condition with only minor cracking
However, a full new layout is the smarter investment when stalls are too narrow for today’s larger vehicles, ADA requirements have changed since the original installation, traffic flow is causing bottlenecks, or major pavement work has altered the lot’s geometry.
How to Plan a Parking Lot Striping Project: Step-by-Step
Planning a parking lot striping project does not have to be complicated. However, skipping key preparation steps leads to substandard results, code violations, or unnecessary costs. Follow this process for the best outcome.
- Assess the current lot condition. Walk the entire surface and document every faded stall line, cracked pavement section, missing ADA marking, and deteriorated fire lane. Surface repairs — crack sealing and patching — must be completed before any paint is applied. Striping over damaged pavement produces poor adhesion and accelerated fading.
- Review ADA and local code requirements. Consult the ADA Standards for Accessible Design and your municipality’s parking ordinances. Determine the required number of accessible and van-accessible spaces for your lot size. Confirm fire lane width and marking specifications with your local fire marshal if necessary.
- Measure and draft your layout. Before contacting contractors, measure your lot’s total square footage, stall count, and any special zones (loading areas, EV charging, reserved spaces). A simple sketch — even a hand drawing — helps contractors provide accurate quotes and identify layout improvements.
- Request itemized quotes from at least three contractors. Contact licensed, insured parking lot striping companies and provide your lot dimensions, space count, material preference, and special requirements. Compare written, itemized quotes — not ballpark estimates. Ask each contractor to confirm they carry general liability insurance.
- Schedule work during low-traffic periods. Coordinate with the chosen contractor to schedule striping during early morning hours, weekdays when business is slow, or weekends. Post temporary signage in advance to redirect vehicles away from freshly painted areas. Plan for a minimum 30-minute closure per section.
- Inspect completed work and document for compliance records. Walk the finished lot with your contractor. Verify line straightness, correct stall and ADA space dimensions, proper symbol placement, fire lane clarity, and directional arrow accuracy. Photograph every section and retain records as documentation of compliance — useful in the event of a future ADA audit or insurance claim.

A professional striping crew uses calibrated equipment to ensure straight, durable lines that meet code requirements.
Parking Lot Striping Cost: Full Pricing Breakdown
Understanding parking lot striping costs helps property owners budget accurately and evaluate contractor quotes with confidence. Pricing varies based on lot size, material choice, layout complexity, surface condition, and local market rates.
Typical Cost Ranges by Project Type
| Project Type | Typical Cost Range | Notes |
|---|---|---|
| Water-based paint (per linear foot) | $0.15 – $0.30 | Most common for standard restriping |
| Thermoplastic (per linear foot) | $0.60 – $1.50+ | Higher upfront; 3–7 year lifespan |
| Small lot restriping (25–50 spaces) | $250 – $700 | Paint only; basic layout |
| Mid-size lot (50–100 spaces) | $500 – $3,000 | Includes ADA and fire lane markings |
| Large commercial lot (100+ spaces) | $2,000 – $10,000+ | Full layout; thermoplastic upgrade option |
| ADA stall (each, including symbol) | $75 – $200 | Includes symbol, aisle stripes, signage prep |
| Fire lane marking (per linear foot) | $0.50 – $1.25 | Includes red curb paint and stenciling |
| Directional arrow stencil (each) | $15 – $50 | Per symbol painted |
Key Factors That Affect Your Final Price
- Lot size and space count: More stalls mean more linear footage — and higher material and labor costs.
- Material choice: Thermoplastic carries a higher upfront cost but delivers a lower lifetime cost per year of service.
- Layout complexity: Curved lanes, angled stalls, multiple entry points, and custom stenciling all add labor time.
- Surface condition: Pavement repairs — crack filling, patching, or sealcoating — must precede striping and add to total cost.
- ADA upgrade scope: Each compliant space requires precise measurements, specific symbols, and correctly positioned signage.
- Geographic market: Labor rates vary by region. Urban markets typically command slightly higher prices than rural areas.
Always request a written, itemized quote. A reputable contractor will break out material costs, labor, stencil fees, and any surface prep charges separately — so you know exactly what you are paying for.
How Often Should a Parking Lot Be Restriped?
Restriping frequency depends on traffic volume, material type, climate exposure, and pavement condition. However, a general rule of thumb gives most property owners a reliable starting point.
- Water-based paint on high-traffic lots: Restripe every 12 to 18 months
- Water-based paint on low-to-medium traffic lots: Restripe every 18 to 24 months
- Thermoplastic markings: Inspect annually; restripe every 4 to 7 years
- After sealcoating: Restripe immediately, as sealcoating covers all existing markings
Texas’s intense UV exposure, summer heat, and heavy seasonal rain accelerate paint fading faster than in many other states. As a result, property owners in the Dallas-Fort Worth region and across North Texas should inspect their lots at least twice per year — once in spring before peak traffic season and once in fall after summer heat stress.
A good rule: if you can no longer clearly see a stall line from the driver’s seat of a vehicle, it is time to restripe. Waiting until lines are completely invisible increases liability exposure and may already constitute a code violation.
Choosing the Right Parking Lot Striping Contractor
Selecting the right striping company is as important as the project itself. A poorly executed job — crooked lines, incorrect ADA dimensions, wrong paint type — can create compliance issues and require expensive corrections within months.
What to Look for in a Striping Company
- Commercial experience: Look for a company with a demonstrated track record across retail centers, schools, healthcare facilities, and municipal lots — not just residential driveways.
- ADA and fire code knowledge: Your contractor should advise you on compliance requirements without you having to research everything independently.
- Professional-grade equipment: Calibrated ride-on striping machines produce far straighter, more consistent lines than walk-behind units. Ask what equipment they use.
- Proof of insurance: Always ask for a certificate of general liability insurance before signing any contract. The Texas Department of Licensing and Regulation (TDLR) oversees contractor business standards statewide.
- Written, itemized quotes: A reputable company provides line-by-line pricing — not vague estimates or per-job lump sums.
- Workmanship guarantee: Ask whether the contractor stands behind their work. A written warranty on materials and application quality is a strong indicator of professional standards.
- Local reputation: Online reviews, contractor references, and an established local presence all indicate accountability and follow-through.
Questions to Ask Before You Hire
- What type of paint or material do you recommend for my lot, and why?
- Do you use ride-on or walk-behind striping equipment?
- Are you familiar with ADA space count and dimension requirements?
- Will you provide a written layout diagram before work begins?
- How do you handle restripes where old lines don’t align with the new layout?
- What is your process if the surface isn’t ready for striping when you arrive?
Property owners in the Denton and Plano areas can explore full-service parking lot striping services at Stripes PLS, which specializes in ADA compliance, fire lane marking, and complete lot layouts for commercial and institutional clients across North Texas. You can also visit their Denton, TX professional striping services page for location-specific information, or browse the full site to learn about their service range.
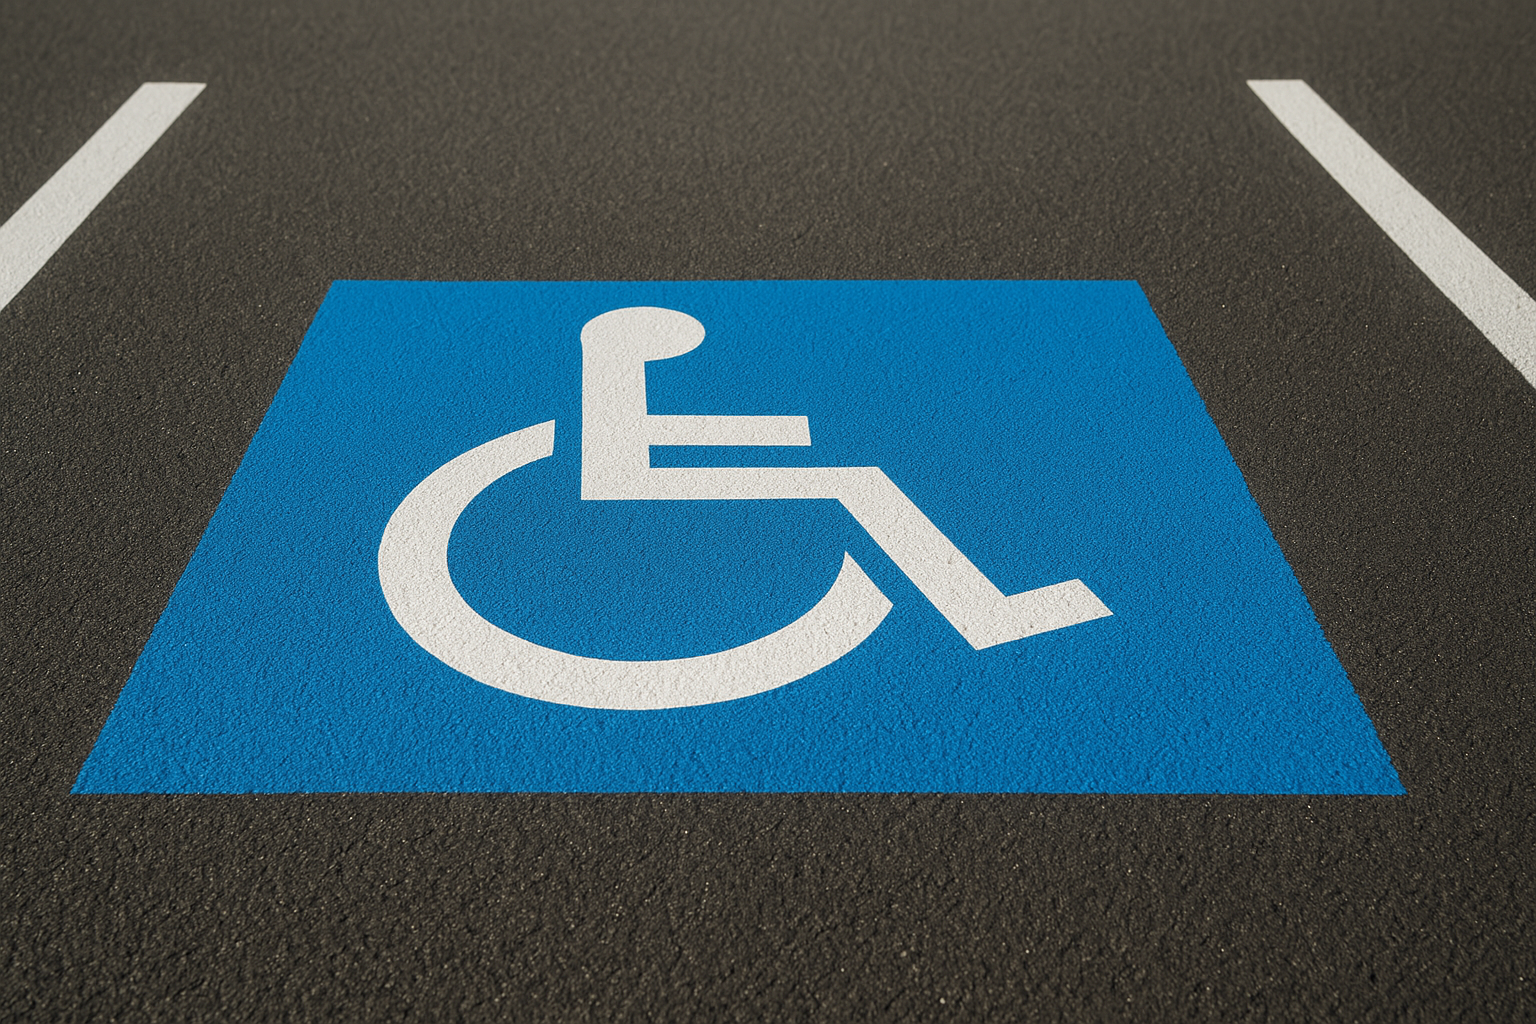
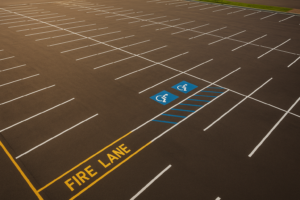
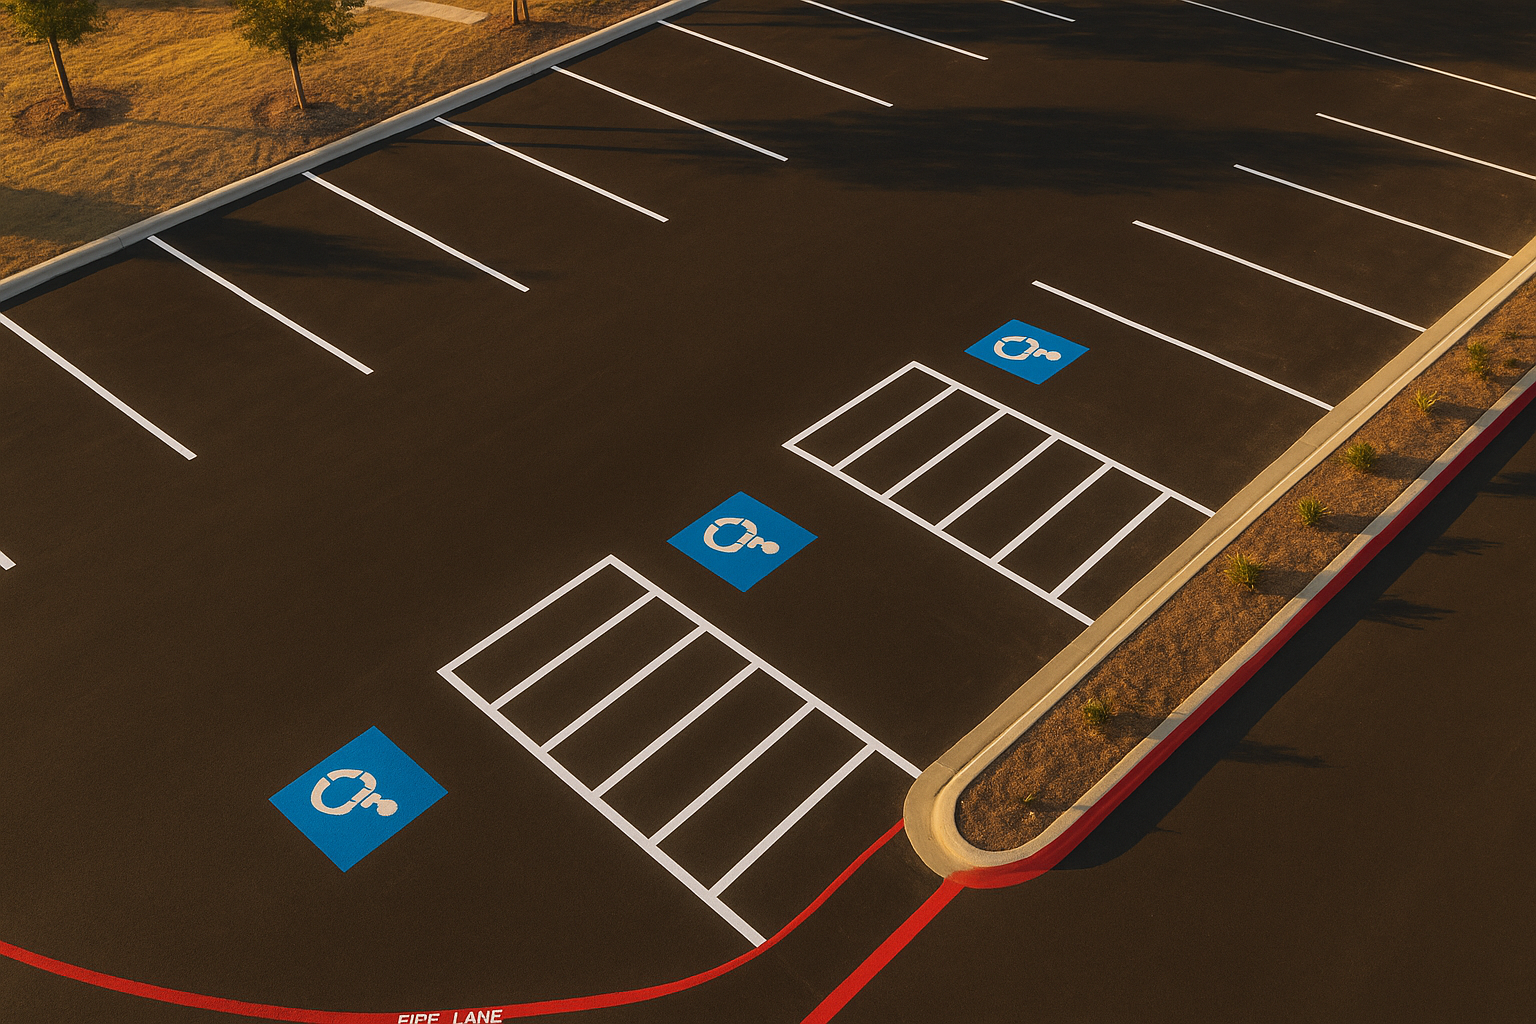
Correctly painted ADA symbols are a required element of every compliant parking lot striping project.
Parking Lot Striping for Specific Property Types
Different property types have different striping priorities. Understanding the unique demands of your facility helps you plan a more targeted, cost-effective project.
Retail and Shopping Centers
High foot traffic and constant vehicle turnover make retail lots particularly demanding. In addition to standard and ADA stalls, retail lots often need clearly marked fire lanes, cart return zones, loading areas, and pedestrian crosswalks. Faded striping in a retail lot is directly visible to customers — making timely restriping a customer experience issue as well as a compliance one.
Healthcare Facilities and Hospitals
Medical facilities typically require a higher ratio of ADA-accessible spaces than general commercial properties. Furthermore, emergency vehicle access lanes, ambulance drop-off zones, and patient loading areas all require precise, durable markings. Thermoplastic is strongly recommended for hospital lots because the cost of lane closures for frequent restriping is high.
School Campuses
School parking lots must balance student drop-off and pick-up flow, staff and visitor parking, bus loading zones, and pedestrian crossings — all in a compressed period twice daily. Specifically, bus lane markings and pedestrian crossing striping must be highly visible at all times. Summer is the ideal time to schedule school lot restriping without disrupting school operations.
Warehouses and Industrial Facilities
Industrial lots face heavy wear from trucks, forklifts, and large delivery vehicles. Both exterior lot striping and interior floor markings (safety lanes, forklift paths, hazard zones) are important. Epoxy or thermoplastic materials are recommended for industrial environments because of their resistance to heavy load abrasion and fluid contamination.
Apartment Complexes and HOA Properties
Residential parking lots must clearly designate assigned spaces, visitor parking, and accessible stalls. Tow-away zone markings and reserved stall numbering are common add-ons. Because apartment lots experience constant low-speed traffic, water-based paint is generally sufficient — with restriping every two years as part of a routine property maintenance schedule.
Weather, Surface Prep, and Best Practices for Lasting Results
Even the best paint applied incorrectly will fail prematurely. Surface preparation and weather conditions are two of the most important — and most frequently overlooked — variables in any parking lot striping project.
Ideal Weather Conditions for Striping
- Surface and air temperature must be above 50°F and below 90°F for optimal paint adhesion
- The pavement surface must be completely dry — no rain in the preceding 24 hours and none forecast for the next 4 to 6 hours after application
- Low humidity (below 80%) promotes faster drying and better color retention
- Avoid direct midday sunlight for thermoplastic application — extreme surface heat can cause adhesion problems
Surface Preparation Steps
- Clean the surface thoroughly. Sweep away all loose debris, dirt, and gravel. Blow out cracks with compressed air. Pavement cleaners or degreasers may be needed in areas with oil stains, which prevent adhesion.
- Repair cracks and damage. Fill all cracks wider than ¼ inch with an appropriate crack filler or hot rubberized compound. Allow repairs to cure fully — typically 24 to 48 hours.
- Complete sealcoating before striping. If the lot is being sealcoated as part of the project, sealcoating must be fully cured (minimum 48 to 72 hours) before any paint is applied.
- Remove conflicting old markings. In a full layout redesign, incompatible old line locations must be blacked out with pavement paint before new lines are applied — otherwise old lines will show through and confuse drivers.
Skipping any of these preparation steps leads to premature peeling, poor adhesion, and markings that fail well before their expected lifespan. A professional striping crew will address all of these items before a single line is painted.
Frequently Asked Questions About Parking Lot Striping
What is parking lot striping and why is it required?
Parking lot striping is the professional application of painted lines, symbols, and pavement markings that organize vehicle spaces, guide traffic flow, designate fire lanes, and ensure ADA compliance. Commercial properties are required by federal ADA law and local municipal codes to maintain clearly marked accessible spaces, fire lanes, and pedestrian crossings at all times.
How often should parking lot striping be redone?
Most lots with water-based paint need restriping every 12 to 24 months depending on traffic volume and UV exposure. Thermoplastic markings typically last three to seven years. High-traffic commercial lots often require annual restriping to keep markings visible and legally compliant.
What is the difference between paint and thermoplastic for parking lot striping?
Water-based traffic paint is more affordable and dries quickly (30 to 60 minutes) but fades faster — typically lasting one to two years under heavy use. Thermoplastic is a heat-applied compound that bonds permanently to the pavement and lasts three to seven years. Thermoplastic costs more upfront but delivers a significantly lower cost per year of service life.
How much does parking lot striping cost?
Water-based paint striping typically costs $0.15 to $0.30 per linear foot. A mid-size commercial lot with 50 to 100 spaces generally runs $500 to $3,000 for a full restripe including ADA and fire lane markings. Larger lots or thermoplastic projects can exceed $10,000. Always request an itemized written quote for an accurate figure.
What ADA requirements apply to parking lot striping?
The ADA mandates a minimum number of accessible spaces based on total lot size, starting with 1 accessible space for lots of 1 to 25 stalls. Each accessible space must be at least 8 feet wide with a 5-foot access aisle. At least 1 in 6 accessible spaces must be van-accessible with an 8-foot aisle. The International Symbol of Accessibility must be painted on the pavement and posted on a sign at least 60 inches above the ground.
Can I do my own parking lot striping?
DIY striping is technically possible for small areas, but it is not recommended for commercial properties. Professional contractors use calibrated ride-on striping machines that produce straight, consistent lines and proper spacing. DIY equipment rarely achieves the precision needed for ADA compliance, fire lane dimensions, or multi-row layouts — and errors can lead to costly corrections or compliance violations.
How long does parking lot striping take to dry?
Water-based traffic paint dries to the touch in 30 to 60 minutes under normal conditions. Hot weather accelerates drying, but the lot should remain closed to vehicle traffic for at least 30 minutes after each section is completed to prevent smearing. Thermoplastic cools and hardens within minutes of application but requires correct surface temperature for proper bonding.
What is a fire lane and how must it be marked?
A fire lane is a designated clear zone that provides unobstructed emergency vehicle access to a building. Fire lane markings typically include red curb paint, “NO PARKING – FIRE LANE” stenciling on the pavement at regular intervals, and posted signage at zone boundaries. Specific requirements vary by municipality and are enforced by local fire marshals.
What weather conditions are needed for parking lot striping?
Striping should be applied on completely dry pavement with air and surface temperatures above 50°F. Avoid scheduling projects when rain is forecast within the next four to six hours. High humidity (above 80%) can extend drying times and reduce paint adhesion. Early morning scheduling on clear, dry days typically produces the best results.
What are directional arrows and why are they important in parking lot striping?
Directional arrows are painted stencils that guide vehicle traffic through the lot in a safe, logical pattern. They reduce head-on conflicts in one-way lanes, minimize congestion at lot exits, and are often required by local ordinance in commercial lots. Without clear directional markings, drivers improvise routes that increase collision risk.
How do I choose a parking lot striping contractor?
Look for a contractor with verified commercial experience, knowledge of ADA and local fire code requirements, professional-grade ride-on striping equipment, proof of general liability insurance, and a portfolio of completed projects. Request at least three written, itemized quotes and ask specifically about workmanship guarantees and their process for handling surface prep issues before work begins.
Does sealcoating affect parking lot striping?
Yes. Sealcoating covers all existing pavement markings completely, which means the lot must be fully restriped after every sealcoating project. Sealcoat must cure for a minimum of 48 to 72 hours before new striping is applied. Scheduling both services together is the most efficient approach — and many professional contractors offer sealcoating and striping as a combined package.
Conclusion: Why Professional Parking Lot Striping Is Worth Every Dollar
Professional parking lot striping is one of the most cost-effective investments a property owner can make. Clear, accurate markings protect every person who uses your lot — from the customer pulling in for the first time to the emergency responder who needs an unobstructed path to your building. Furthermore, compliant striping keeps you on the right side of ADA law, local fire codes, and insurance requirements.
In summary, whether you need a brand-new layout, a routine restripe, targeted ADA upgrades, or fire lane maintenance, working with an experienced local contractor delivers results that last and compliance that holds up under scrutiny. Property owners in the Denton and Plano areas can request a free quote from the team at Stripes PLS and take the first step toward a safer, more organized, and fully compliant parking facility today.